




For a severely resorbed mandibular ridge, a neutral zone denture can turn the patient's own muscle activity from a destabilizing force into a design guide. Recording the balance between the tongue, cheeks, and lips helps the clinical and laboratory teams position teeth and contour polished surfaces where function is less likely to dislodge the prosthesis.
A neutral zone denture is a prosthetic designed to sit where muscle forces from the tongue and cheeks are in balance. This potential space is where soft tissue pressure does not move the denture during speaking or eating. According to research from PMC, this method is most useful for patients with severe bone loss in the lower jaw. By placing the teeth within this zone, you can reach much better stability for difficult anatomy. Digital workflows now allow you to record these forces and use the data to create a precise CAD/CAM design. This approach ensures the final prosthetic stays in place even when the ridge provides very little support. These records help you plan the tooth position for both stability and clear speech.
Managing complex cases requires a clear understanding of how soft tissue affects prosthetic stability and how that information can be carried into a digital workflow. The process begins with the clinical principles behind a neutral zone denture.
What is a neutral zone denture?
A neutral zone denture technique is a custom way to build a denture based on the exact muscle forces in a patient's mouth. Most standard dentures focus mainly on the bone ridge. This approach looks at the space where the tongue, cheeks, and lips work as one. This area is a potential space where the outward push of the tongue fully matches the inward push of the lips and cheeks. When a denture sits in this zone, it stays steady even during active moves like speaking, chewing, or swallowing.
Finding the point of balance
The core idea of the neutral zone was first written about by Wilfred Fish in 1948. He found that the mouth has a specific area where muscle forces reach a state of balance. In many cases, dentists feel they must place teeth directly over the center of the bone ridge. However, as bone wears away, that ridge often shifts. Forcing teeth into a spot that does not match the muscle balance can cause the denture to pop out or tilt during use.
By using neutral zone recording for stability, dentists can find exactly where the teeth should sit to avoid a muscle clash. This process involves using soft materials that the patient's own mouth muscles shape. The result is a record that shows the "neutral" area where the forces are equal. This data allows for a much more precise setup than relying on bone alone. It ensures the teeth are in the best spot for the patient's unique mouth shape.
Why polished surfaces matter
In a neutral zone denture, the shape of the outer polished surface is just as vital as the fit of the base. Most dentures focus on the part that touches the gums. But the outer parts are what the lips and tongue feel. If these parts are too thick or shaped poorly, the muscles will catch on them and lift the denture. A well-designed neutral zone denture has shapes that help the muscles actually hold the device in place instead of pushing it out.
AvaDent's digital system can now add these records directly into the design phase. This allows for integrating neutral zone records into a high-strength XCL base. Because these materials are up to eight times stronger than old PMMA, they provide long-term steadiness even in thin areas. This mix of muscle-led design and digital precision ensures the denture stays where it belongs for years to come.
The mandibular challenge
The neutral zone approach is most helpful for the lower jaw, or mandible. Lower dentures often struggle to stay in place because the tongue is so active and the bone ridge is often small. When the ridge is fully worn down, there is very little bone left to grip. In these cases, the muscles of the floor of the mouth and the tongue become the main drivers of whether a denture stays or goes.
Using a neutral zone denture helps solve this by using the patient's own habits to guide the fit. Instead of fighting against the tongue, the denture works with it. This reduces the need for many follow-up visits and painful sore spots. For patients with complex needs or poor muscle control, this path offers a much more certain result than old methods. It gives them the fit and function they need for daily life.
When should you consider a neutral zone record?
You do not need a neutral zone record for every case. Most patients do well with standard clinical steps. But for some, a neutral zone denture is the only way to get a stable fit. You should use this path when a patient has very little bone left to hold the base. It is also useful when past plates have failed despite a good fit and bite.
Helping very thin ridges
When a patient has a very low or flat lower ridge, there is no bone wall to keep the plate from moving. The base often slides side to side or tips when the patient talks. In these cases, the neutral zone technique helps you find the exact spot where the tongue and cheeks do not push the teeth out of place. This helps the plate stay still during daily use.
This neutral zone recording for stability is key for cases with high bone loss. It lets you build the arch where the mouth forces are even. This makes the denture more stable even if the ridge is gone. Many clinicians see cases where the plate looks perfect but still falls out. This often happens because the teeth sit where the cheeks or tongue hit them. A neutral zone record solves this by mapping the safe space in the mouth.
Patients with poor muscle control
Some people have a hard time moving their mouth or tongue due to health issues. Stroke or Parkinson's can make it hard to keep a plate in place. These neuromuscular problems mean the patient cannot help hold the plate down with their tongue. A neutral zone record finds the best fit for their unique muscle habits. It ensures the muscles help hold the teeth down instead of lifting them up.
By adding neutral zone records to a digital plan, you get a fit that works with the body. This is also helpful for patients with unusual tongue habits or scarred tissue from old hurts. It maps the space where the denture can sit without being bumped by the tongue. This leads to a better fit and less pain for the user.
Finding the right path
You may not need this step if the ridge is tall and strong. If a patient has good bone, a standard digital workflow is fast and works well. Also, implants are often a better choice if the patient has enough bone to hold them. Implants give more bite force than any gum-fit plate can. Use the neutral zone for cases where surgery is not an option or bone is too thin for screws.
| Case Factor | Standard Denture | Neutral Zone Denture |
|---|---|---|
| Ridge Height | Tall to Medium | Very Low or Flat |
| Muscle Control | Good Control | Poor or Weak Control |
| Tongue Size | Normal | Large or Active |
| Stability Level | High to Fair | Low without extra steps |
| Work Difficulty | Low | High |
How do you record the neutral zone clinically?
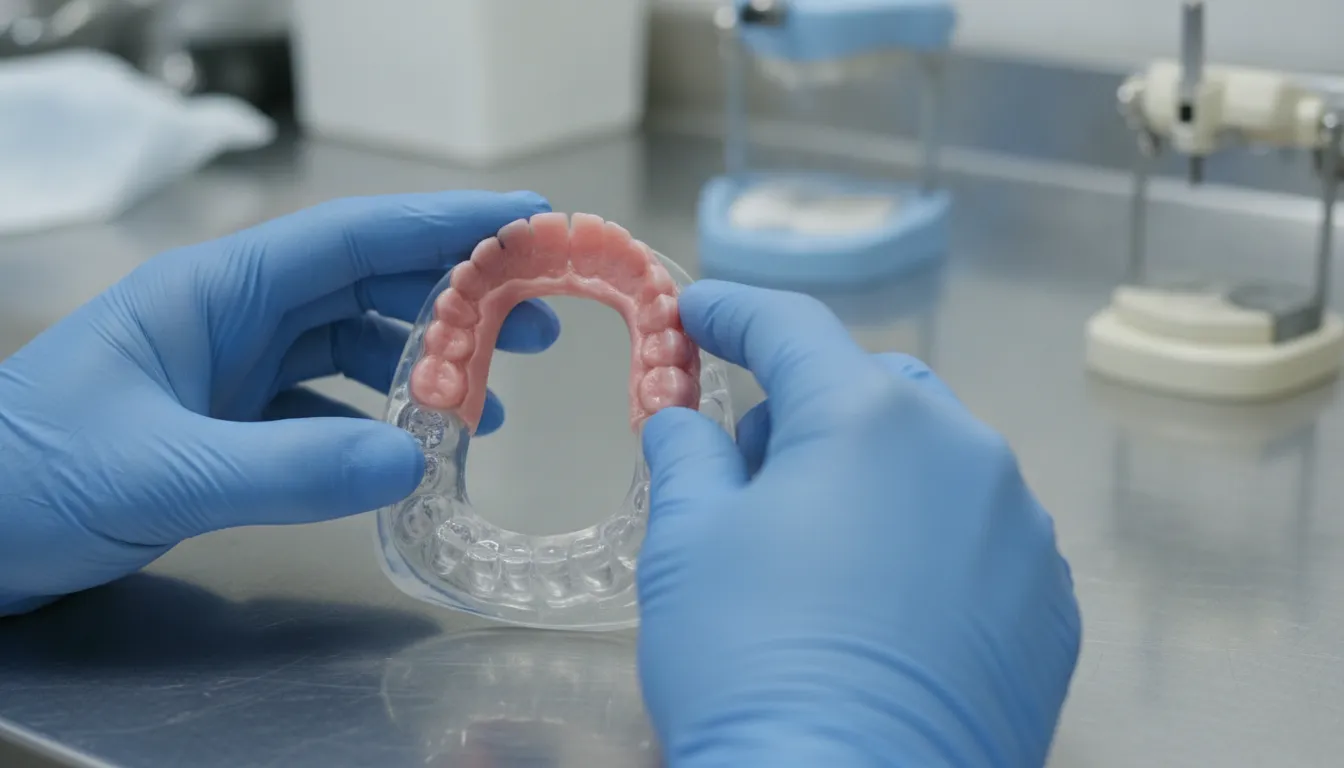
Making a record of the neutral zone is an exact task. It needs a clear path to make sure the denture stays still. Dentists use this way for patients with very thin jaw bones. The goal is to find the space where muscle forces are in balance. This helps the denture stay in place during daily use. It also helps the patient speak and eat with ease.
Early steps and stable bases
Before you start, you need a good fit. Begin with top early and final molds. These give the base for a strong record. For the best results, use a base that does not warp or move. Stable bases allow for better adding neutral zone records into the digital plan. This step makes sure that the final denture sits exactly where the muscles allow it to rest. A loose base will lead to a poor record. You must check that the base stays still while the patient moves their mouth.
The dentist must also check the jaw height. If the height is wrong, the muscles will not work in a real way. This can make the record less useful. Use a wax rim to find the right bite before you start the molding. This gives you a firm guide for the next steps.
- Start with a stable record base and a wax rim to check the proper bite and jaw height.
- Place a soft molding item on the base to capture the shape of the mouth muscles.
- Ask the patient to swallow, sip, and speak to shape the soft item.
- Make a hard plaster index of the record to keep the exact shape of the neutral zone.
- Set the denture teeth within the space shown by the index for the best stability.
- Check the fit and change the outer surfaces to match how the patient moves.
- Give the final denture and check that it stays still during speech and eating.
Muscle molding and patient movement
The heart of the work is the molding stage. You must use an item that flows well but holds its shape after it sets. Common choices include soft wax or tissue items. As the patient moves their mouth, the lips and tongue push the item into a neutral zone place where forces are equal. This space changes slightly with muscle action and how the patient moves.
During this time, the patient should stay active. Ask them to whistle or make large face moves. This makes sure that the record covers the full range of muscle use. If the record is too thick, the denture will feel bulky. If it is too thin, it may lack the strength it needs. The dentist must watch the patient closely during this phase.
Digital tools and final delivery
Modern tools make this work easier. You can scan the record and send it to a design site. This allows for a very exact tooth set up. These neutral zone denture techniques lead to a better fit. Patients often find these dentures more comfortable. They do not fight against their own muscles. This leads to fewer changes and happy patients.
Using a digital path also saves time. You do not need to make as many hand-made models. The computer can match the teeth to the record with great speed. This helps the dental lab build a better denture. When you deliver the denture, it should feel natural from the first day. This is the main benefit of the neutral zone way.
How can a neutral zone record inform digital design?
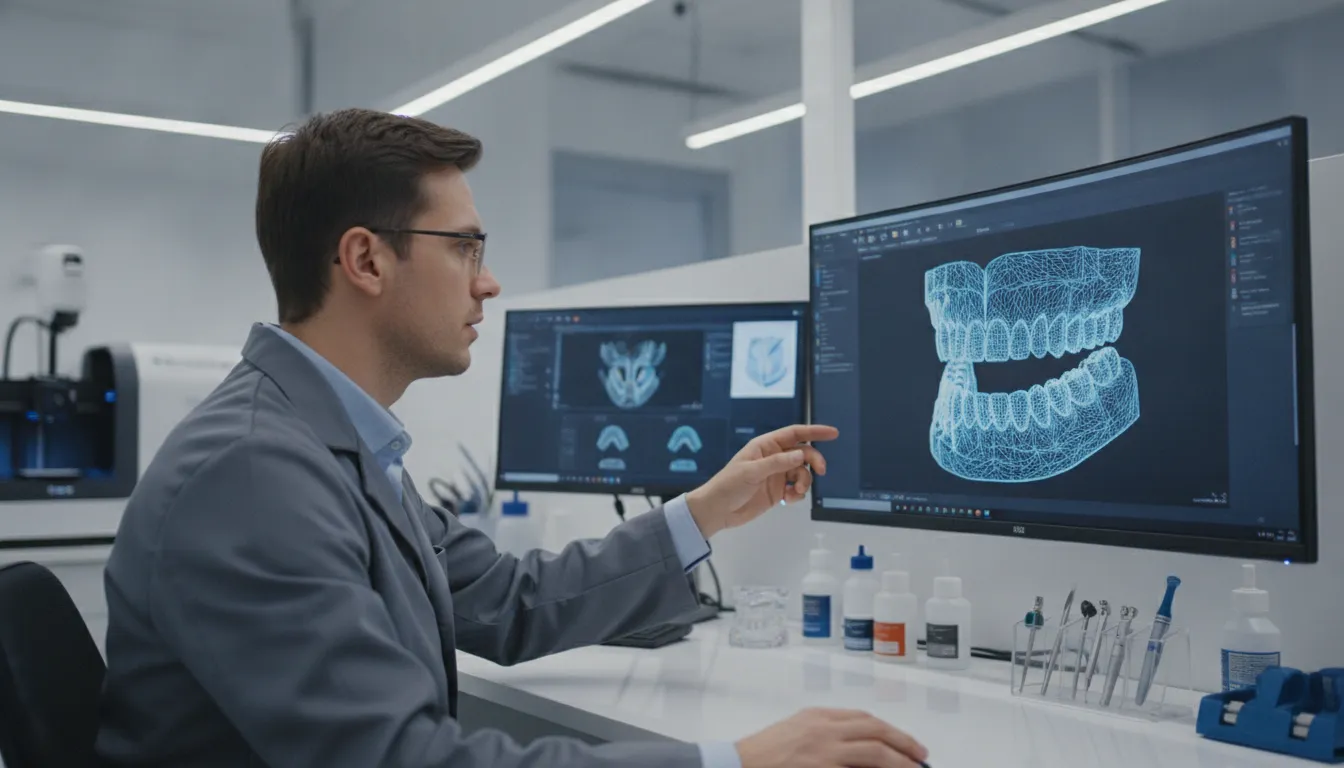
A neutral zone record gives the design team a clear map of the mouth. It shows clearly where the muscles, tongue, and cheeks move. This data is vital for a denture to fit well and stay in place. When you use a digital path, this physical record becomes a guide for the CAD software. It helps the lab create a denture that works with the patient's own mouth forces.
Scanning and record transfer
The first step is to turn the physical record into a 3D scan. Lab teams scan the neutral zone record along with the upper and lower molds. This process ensures the digital file captures every detail of the muscle-molded space.
High-tech scanners pick up the unique shapes formed by the tongue and cheeks. This step is key for using neutral zone records in the digital design. It removes the guesswork that often comes with old lab methods.
Digital design platforms help labs place data in the right spot. They can overlay the neutral zone scan onto the ridge scan. This lets the team see the safe zone for tooth placement.
Research shows that recording the neutral zone helps place teeth where muscles will not move them. The CAD tool makes this transfer precise and fast. It creates a stable base for the rest of the design work.
Tooth and flange design
Once the record is in the system, the AI can help set the teeth. The software looks at the neutral zone data to find the best arch form. It places each tooth in a spot where the forces of the tongue and lips are in balance.
This is very helpful for patients with flat ridges. When ridges are small, muscle control is the only thing that keeps a denture from sliding. The digital tool ensures the teeth do not sit too far in or out.
The design also shapes the polished surfaces, or flanges. A digital design tool can craft the flange to match the muscle paths well. This makes the denture feel more real and less bulky.
It also helps with speech and chewing. By following the neutral zone, the lab can make a denture that uses muscle force to stay down. This leads to a better fit and fewer trips back to the clinic for changes.
Checking the final design
Before making the final denture, the digital plan undergoes a check. Doctors can review a digital preview or a 3D-printed try-in. This lets you see how the design fits the patient's unique mouth space.
You can check the tooth position and the flange shape before the final mill. If something looks off, you can make a quick change in the software. This saves time and avoids the need for new molds.
It makes the whole process more certain for the doctor and the patient. Precision tools then cut the denture from a solid block. This avoids the shrinkage and warps found in hand-made dentures.
The final piece matches the digital design with great detail. This level of exact fit is hard to reach with old wax tools. By using a digital workflow, you get a denture that is strong and stable. It gives patients a better life by letting them eat and talk with ease.
Common neutral zone errors and how to prevent them
Making a good neutral zone denture takes care at every step. Small mistakes during the clinical phase can cause the denture to move or feel loose. Doctors often have problems when the record base shifts or when the wax is too thick. Knowing these common errors helps you get better results for your patients. It also lowers the need for future changes.
Stabilizing the record base
One common error is using a record base that is too long or does not fit. If the base moves while the patient speaks, the recorded space will not be exact. You must check that the base stays still and does not hit the lips or tongue. A good neutral zone recording for stability begins with a firm base. Check all edges for soft tissue fit before you add any recording material.
Another risk is losing the right vertical height during the task. If the patient closes too much or too little, the arch shape may change. Using stops or clear marks helps keep the vertical height at the right level. A steady base and controlled jaw moves are needed for a clear record. This shows the space where the tongue and cheek forces meet in balance. Research in the Journal of Conservative Dentistry notes that a stable base is vital for success.
Refining material and patient moves
Too much material is a frequent problem in neutral zone denture work. If you use a large amount of wax or compound, the patient may find it hard to move in a normal way. This extra bulk can push muscles into the wrong spots. This leads to a denture that is too thick. It is best to start with a thin rim and add small amounts until the space is full. Many doctors prefer using soft wax or tissue conditioner for these records.
Poor patient moves can also ruin the results. Patients might use too much force or move in ways that do not match real life. Ask the patient to do light tasks like sipping water or talking softly. These simple moves help find the zone where oral forces are equal. Studies show that balanced muscle forces are vital for denture success. Do not let the patient over-act their moves, as this creates a poor arch shape.
Avoiding tooth placement mistakes
A big error happens when teeth are set outside the recorded zone. Even with a great record, putting teeth too far toward the cheek or tongue will cause them to move. The lab must follow the arch shape exactly to keep the denture in place. Using the neutral zone for prosthetic stability requires doing the clinical steps closely. This ensures the teeth sit in the right spot for the tongue to rest.
Forgetting the shape of the polished base can also lead to failure. The outer curves of the denture should match the muscle paths just like the teeth. If the base is flat, the tongue and cheeks cannot help hold it down. Seeing the technique as a full system prevents many stability issues. This helps create a final prosthetic that stays firm and feels natural. It also improves how the patient speaks and eats with their new denture.
How do you validate the design before delivery?
Testing stability and speech
At the try-in stage, your main goal is to check that the teeth sit in the neutral zone. This is the space where the tongue and cheek muscles reach a state of balance. If the teeth are outside this zone, muscle movement will push the denture out of place. You must check for stability during common acts like speech, swallowing, and chewing. A well-placed neutral zone denture should stay still even as the patient moves their mouth.
Checking speech is also a vital part of the try-in process. The patient must be able to make clear sounds without the teeth clicking or the tongue feeling cramped. This step ensures there is enough tongue space for natural speech. For more help with this part, you can view our full-arch restoration tips online. Proper tooth placement helps the patient adapt to their new teeth much faster. Research shows that setting teeth in this zone has a direct effect on speech for denture wearers.
Checking looks and tissue support
Next, you must look at how the teeth look and how the edges fit the mouth. The lips and cheeks should have the right amount of support. This support comes from the smooth surfaces and the shape of the denture base. You should check the smile line and how the teeth look during a full, natural smile. The stability of complete dentures depends on a good peripheral seal and balanced position.
Occlusion is another key factor you must check during the try-in visit. The teeth must meet evenly to prevent tipping, which can cause sore spots later. Check the edges to ensure they do not get in the way of muscle action. If the edges are too thick, they may lift the denture when the patient smiles or talks. A precise fit during this stage reduces the need for many denture changes after the final fit.
When to adjust or remake the record
Sometimes, the try-in shows that the fit or the bite is not quite right. You may need to reset the case or make small changes to the tooth positions. If the stability is very poor, you might need to remake the record. This often happens if the first records did not capture the muscle forces with enough care. In the digital denture workflow, these changes are often much easier to handle.
Using a digital design platform helps ensure the final result is reliable. It allows for precise tooth placement based on the unique muscle data from each patient. If the try-in is not perfect, it is always better to fix any issues before the final stage. This step saves chair time and leads to a much better result for the patient. A successful final fit starts with a thorough and careful check at the try-in phase.
Frequently Asked Questions
Why is the neutral zone important for severely resorbed mandibular ridges?
In cases of severe ridge loss, traditional mechanical retention is often insufficient. Recording the neutral zone allows clinicians to find the specific area where the inward pressure of the lips and cheeks balances the outward pressure of the tongue. According to research on PMC, placing denture teeth in this zone prevents muscle forces from dislodging the prosthetic, which is vital for stabilizing a mandibular denture when the bony ridge is flat.
How does the neutral zone approach improve denture stability?
The neutral zone technique ensures that the surrounding muscles work with the denture rather than against it. By shaping the denture base to match the patient's unique oral function, the prosthetic stays in place during speaking and chewing. This method creates a custom fit that uses natural muscle activity to hold the device down. Clinicians use this approach to help patients who struggle with loose dentures despite having a well-made conventional set.
Can CAD/CAM record bases be used with the neutral zone technique?
Yes, modern digital workflows can fully integrate this clinical step. High-precision record bases made with CAD/CAM technology provide a stable platform for recording the neutral zone in the mouth. Once the clinician captures the muscle movements using a soft material, the resulting shape is scanned and uploaded. The AvaDent design platform then uses these digital records to place teeth in the ideal position for both stability and clear speech.
Who is a candidate for neutral zone denture fabrication?
This approach is best for edentulous patients with specific clinical challenges. Ideal candidates include those with flat or concave lower ridges where standard suction is impossible. It is also helpful for patients with atypical tongue habits, muscle tremors, or past surgical changes that affect how the cheeks and tongue move. By using this method, dentists can provide a more predictable outcome for patients who have failed to find comfort with traditional denture designs.
Does the neutral zone technique help with speech?
Correct tooth placement is essential for proper phonetics and clear speech. When teeth are set outside the neutral zone, the tongue or lips may strike them at the wrong time, causing clicking sounds or slurred words. By recording the patient's functional movements, the lab can place the teeth exactly where they do not interfere with the natural flow of air or tongue motion. This results in a prosthetic that feels natural and allows for better communication.
Ready to set up a more stable digital denture workflow?
Waiting to fix poor denture fit can lead to more bone loss and unhappy patients. If you stay with old ways, you may face more chair time and costly remakes. Start using digital records now to get a better fit the first time. This change will help your practice grow and save you time each week. You can give your patients the stable results they need to eat and speak with ease. By moving to a modern path today, you avoid the stress of loose teeth and failed cases. The sooner you start, the faster you can see better clinical results in your office. Learn more about integrating neutral zone records to see how this fits into your daily care. Do not let old methods slow your practice down or hurt your success with tough cases.
Ready to discuss a more stable digital denture workflow for a difficult edentulous case? Call AvaDent at 480-275-7144.