Dashboard Login
Store
1st Appointment
Reference Denture
The reference denture technique takes advantage of the patients current denture to use as a foundation for the new prosthesis. Information as to tooth position, base extensions, esthetics, interocclusal relation, retention and occlusal position can be used as a reference for your work. There is no need to entirely redesign your prostheses if the patient presents with a denture that has satisfied them over time. The new prosthesis can take advantage of the successful qualities of the old prosthesis and make changes on any quality that needs improvement. This technique can be used on the majority of patients that come to your office since most clinicians are not seeing patients that are new denture wearers.
Step 1

Step 1 - Selecting Your Patient

This technique should not be used for every patient that presents to your office requesting new prosthesis. The patient must have been satisfied with their current prosthesis in the past and has come to you because the denture is no longer serviceable. The patient might state that the denture is discolored, is now loose, or they were no longer satisfied with how the denture effects their facial esthetics. A patient presenting with these or similar comments should be a good candidate for using the reference denture technique. In contact, if the patient is unhappy with their current denture, the reference denture technique should not be use. In many cases, the patient will feel that your new denture is just an extension of the failed denture they are wearing and will blame any inadequacies of the new prosthesis our your technique.
Step 1

Step 1 - Selecting Your Patient

The patient illustrated here has not been happy with the esthetics of the denture but reports that the prostheses have served her well as far as function is concerned. She has worn dentures for many decades and does not have unrealistic demand as a patient. It is apparent that changes to the position of the the maxillary anterior teeth have the potential of greatly improving the look of the denture. The midline of the maxillary central incisors is not in alignment with the esthetic midline of the face, the maxillary anterior teeth are set too far labially and are anterior to the wet dry line of the lower lip. The shade and size of the teeth of the appear to be appropriate for the age of the patient. The esthetic and natural quality of the anterior teeth can be improved by creating a more natural negative space that will more naturally enhance the individuality of each tooth. The smile line of the anterior teeth is not in balance with the lower lip and creates an artificial look that can be easily corrected in the final denture.

Step 2 - Evaluating the Patient's Current Prostheses

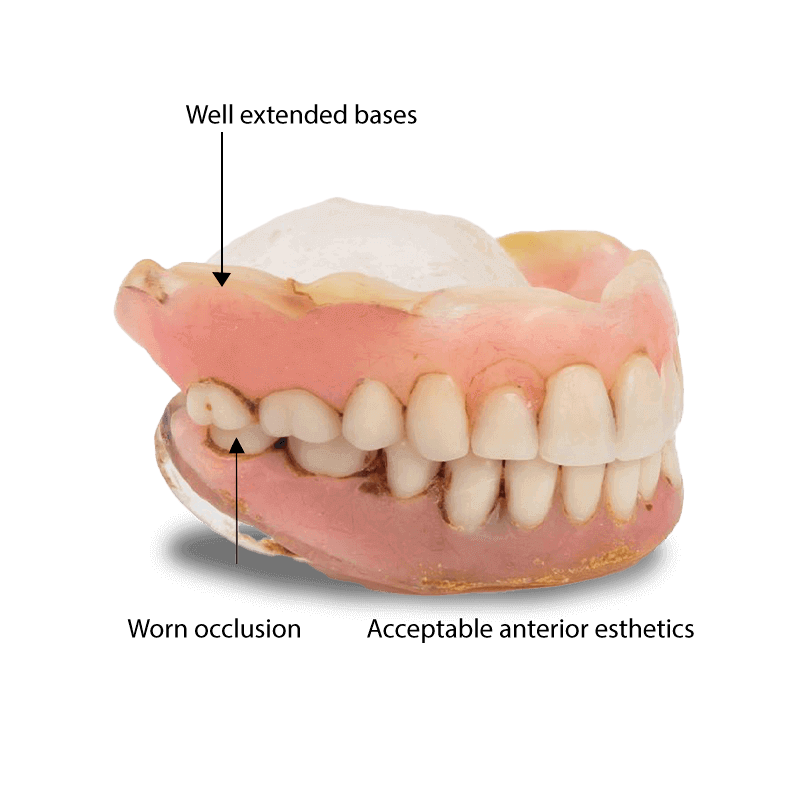
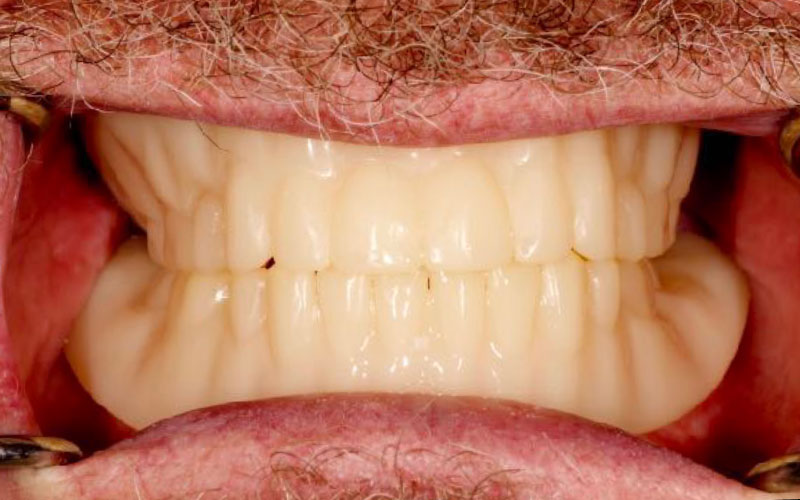
Once the patient has been evaluated and deemed a good candidate for the Reference Denture Technique, the clinician must then evaluate the patient’s current dentures. Are the extensions of the denture base appropriate for the anatomy of the patient? Have the teeth worn and had the occlusal vertical dimension closed because of it? Are the bases coving the tuberosity of the maxilla and the retromolar pages of the mandible? Are all the basic criteria that make a successful denture found in the patient's current prosthesis? The clinician must make the decision that the current denture can be used as the foundation for the new prostheses.

In the denture illustrated here, all the criteria have been met. The patient reports that the dentures have served them well for the last 10 years. The extensions of the maxillary and mandibular bases appear to be appropriate for the patient. The teeth, although worn are in the appropriate exposition, the occlusal plane bisects the dentures and appears to be in alignment with the patient's anatomy. In this case, both the patient and the clinician were happy with the position and esthetics of the dentures and no radical changes are required. The vertical horizontal and vertical overlap appear to be appropriate. This is an ideal denture for the reference denture technique.

Step 3 - Extending the Borders of the Denture If Required

Even though the patient is not often aware of an improperly extended denture, the clinician must correct under or over extended flanges, dentures that do not cover the tuberosity or pear shaped pad. This can be done by adding wax, modeling plastic impression compound or malleable thermoplastic resins (bigjawbone LLC) as illustrated here. These extensions can be formed by using the same border motions used to make a final impression.

Over extentions of the old denture must not be modified but rather observed and recored to be adjusted in the patient’s trail denture. It is not wise to adjust the patient’s old denture. If the patient becomes dissatisfied with your care, they may insist that you have improperly adjusted their denture and expect some compensation from you for your improperly modifying the prosthesis.
It was determined that the patient’s old dentures did not appropriately cover the retromolar pads. Even though the patient did not complain, it is a basic understanding that the pear shaped pads should be covered by the mandibular denture base. Denture stability can potentially be improved and the supporting bone will be affected less by the denture itself
Step 3

Step 4 - Making the Impression

The final impression is made in the patient’s existing denture. The impression technique demonstrated here is utilizing Aquasil Ultra Plus fastset, a polyvinylsiloxane , but any impression material can be used.

First paint adhesive to the intaglio surface - Using the appropriate adhesive place a thin coating of adhesive over the entire intaglio surface of the denture making sure to extend the adhesive coverage to include the borders and adjacent cam surface. This will allow the impression material to securely bond to the old denture and not move during the scanning process.
Make sure the adhesive is carried onto the cameo surface. This will insure that the borders will be properly bonded to the denture.

Some clinicians do not recommend painting the impression claiming that the adhesive is too hard to remove and the impression material tends to adhere to the old denture with out adhesive. This may be true for thick impressions but, most impressions made in the patient’s existing denture is very thin. The thin area of impression material have a tendency to flap and fold during the disinfection process and can lead to an immaculate scan. 

The adhesive is easily removed with isopropyl alcohol.

The final impression is made with Aquasil Ultra+ Fast set LV

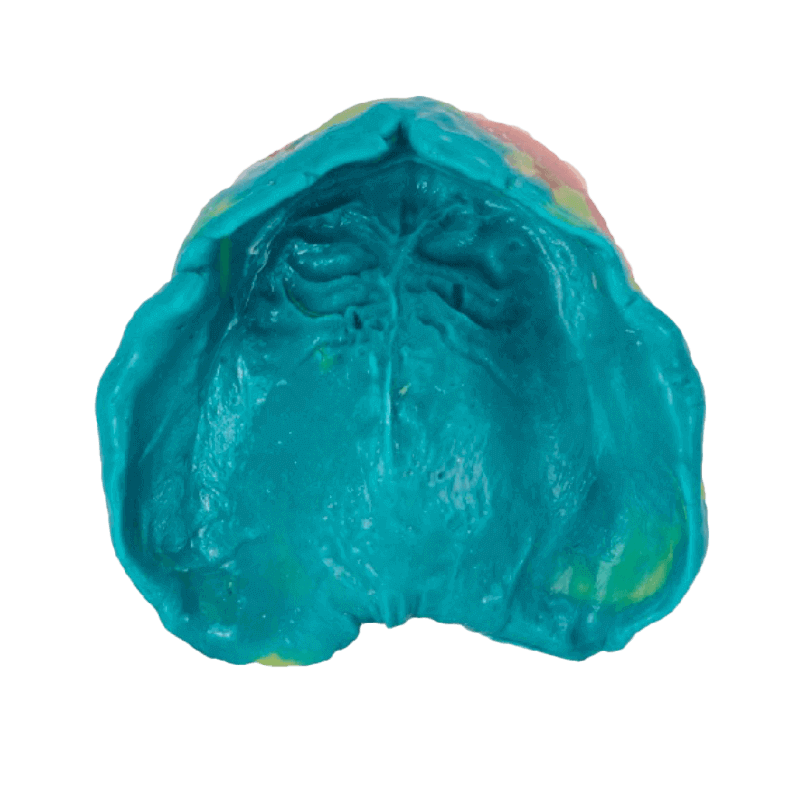
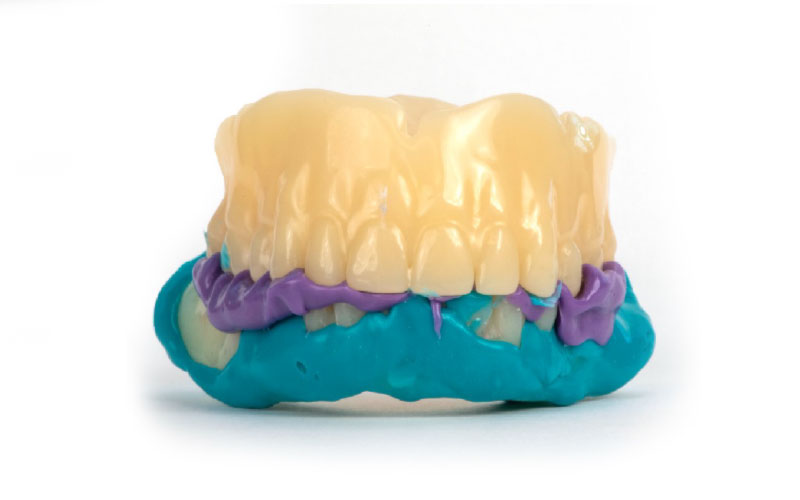
  1. The length, width, and position of the final borders should represent the final shape of the denture. This is not always easy to accomplish but it should be your goal. This makes it much easier for the technician to create a digitally fabricated occlusal base, BTI, or WTI.

  2. You will still have   “show throughs” in the final impression.

  3. The technician can quickly correct over-extensions of the flanges and cameo surface if they have examples of well-formed borders in other parts of the impression.

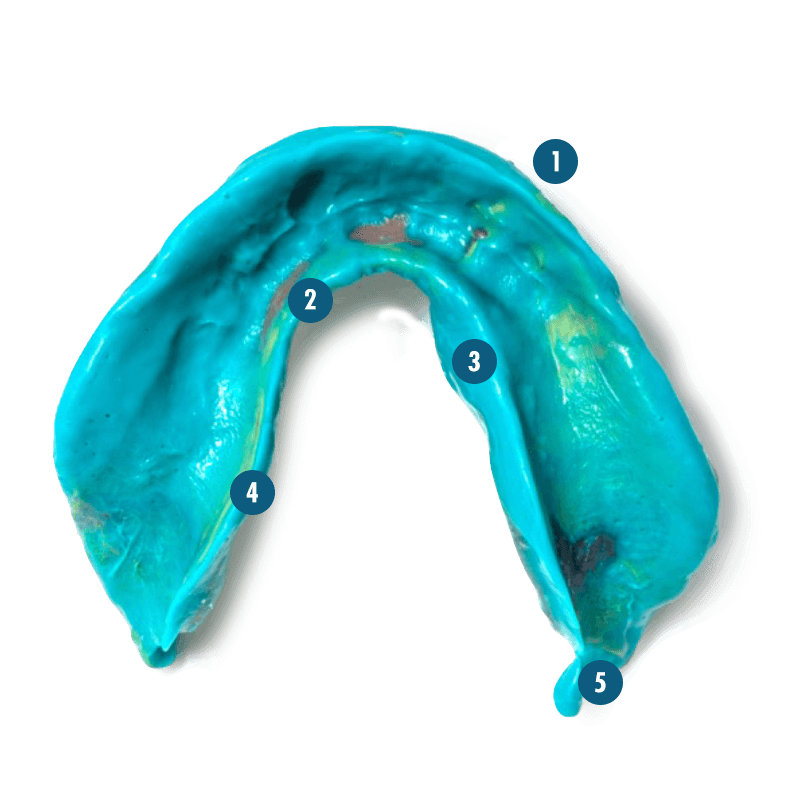
  4. In this example, the S-shaped curve is fully developed

  5. Extra material can easily be trimmed away prior to scanning the impression.

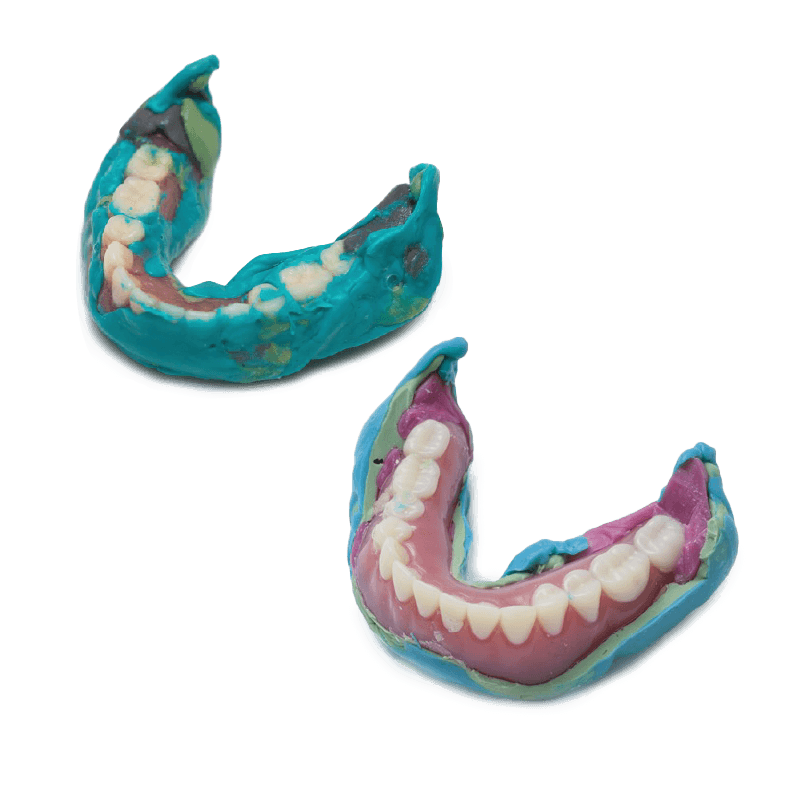
Repeat the process for the maxillary impression.

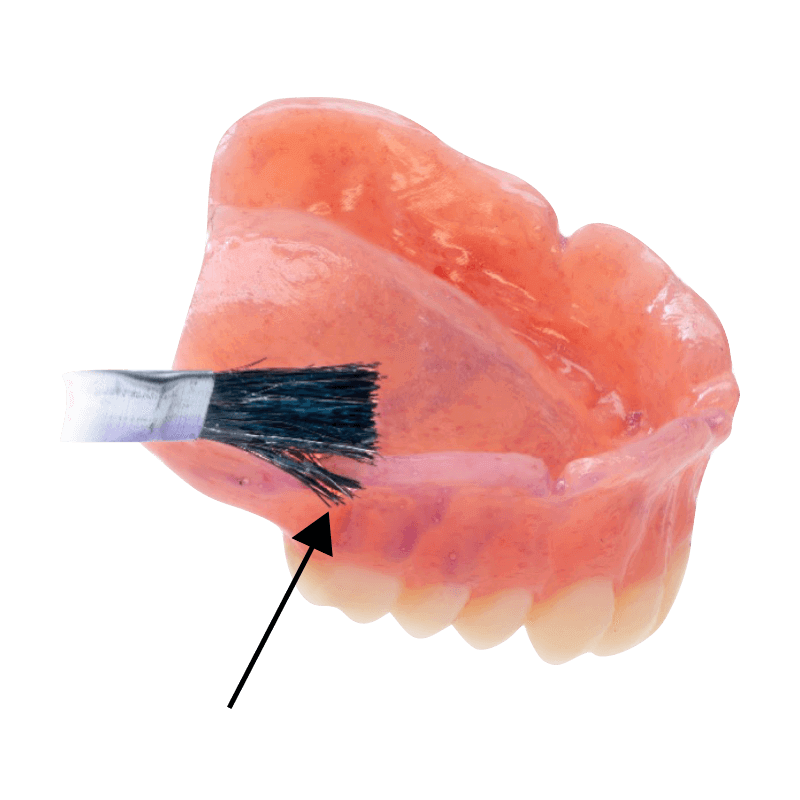
Once the impression is finished, any impression material would interfere with making an interocclusal record. Remove excess material with a Bard Parker Blade.

In some instances, additions to the posterior portion of the denture will interfere with closure against the maxillary denture and impression. These areas must be carefully evaluated.

Scan the maxillary and mandibular dentures using an intraoral scanner.

2nd Appointment
Reference Denture
2nd Appointment
The monolithic denture, also called the biofunctional denture or the Bouma Try-in, referencing Lars Bouma of Oklahoma City, is a simple and effective trial denture that can be formed with a printer using a single-colored resin. The dentures themselves represent the design of the technician and incorporates a very accurate intaglio surface, accurate occlusion and accurate tooth placement. These can be constructed either by the technician themselves in the dental laboratory or in a dental practice using an inexpensive printer. The resins used for a monolithic denture are typically designed specifically for that purpose. They are not designed for long-term use, although many times they can be used effectively as a trial denture. These dentures are inserted at appointment two and allowed to settle in the patient's mouth.
2nd Appointment
The patient is allowed to wear the teeth and give their initial opinions. Any areas that require modifications, such as the shortening of the labial flange, adjustment of a sore spot, initial correction of occlusion, can be developed at this time. These dentures allow you to evaluate the design of the technician and may or may not reflect as an exact copy of the initial reference denture. The techniques used to make a monolithic dentures are not designed to exactly copy the contours of the reference denture, but are used as a framework on which new SDL files representing the dentition can be replaced on the existing denture.


The great advantage of a monolithic trial denture is that it fits as well as the impression and will fit as well as the final product. This will allow you to adequately correct any undercuts, adjust lip support, adjust for any soft tissue contacts in movement, and will allow you to evaluate the tooth position, midline, vertical dimension of occlusion, centrical relation, if that was recorded in appointment one. The chief disadvantage of the prosthesis is that it's monolithic, it's one color, and that many patients cannot adequately evaluate the aesthetics of the teeth since the color of the teeth and the color of the gingiva are the same.


The digital workflow has the advantage of allowing the clinician to send photographs with any digital data representing the teeth themselves. This has always been an advantage to the technician, but has been rarely used by most clinicians. Photographs can easily be sent digitally along with the notes that you've made on the prosthesis itself and this greatly helps the technician himself. The three techniques that we use for communicating to the technician at this point are photos, notes, and markings.
2nd Appointment

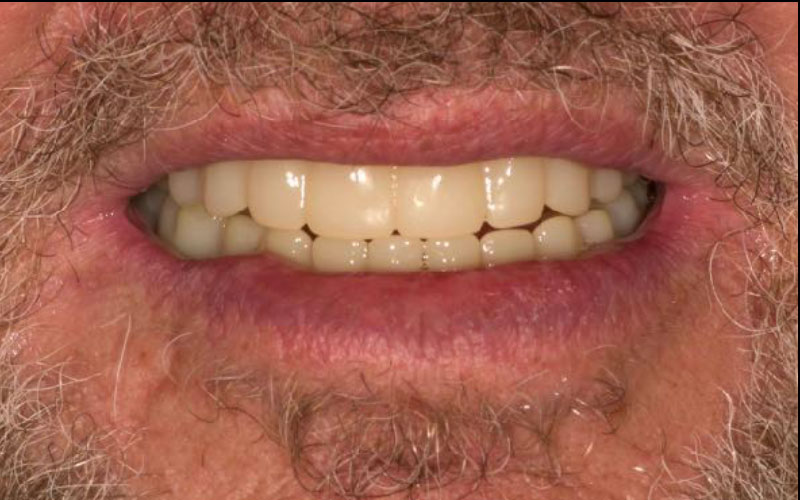
Several photographs are routinely taken for use by the technician. Illustrated here is a close up of the patient in occlusion. The lips are parted and this allows the technician to have some sense of the tooth positions relative from the maxilla and mandible. The exposure of the maxilla and mandibular teeth, the buccal corridor, occlusion, and lip support

2nd Appointment

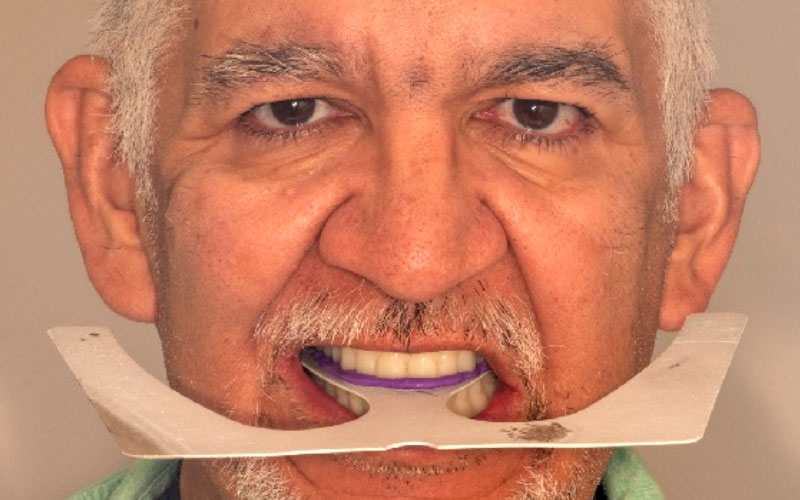
Retractors are used to display the entire denture of the oral cavity. This allows the technician to get a sense of the occlusal planes, have a sense of the extensions of the denture, the negative space created around the denture, and the appropriateness of the plane of occlusion.

  • 2nd Appointment
  • 2nd Appointment

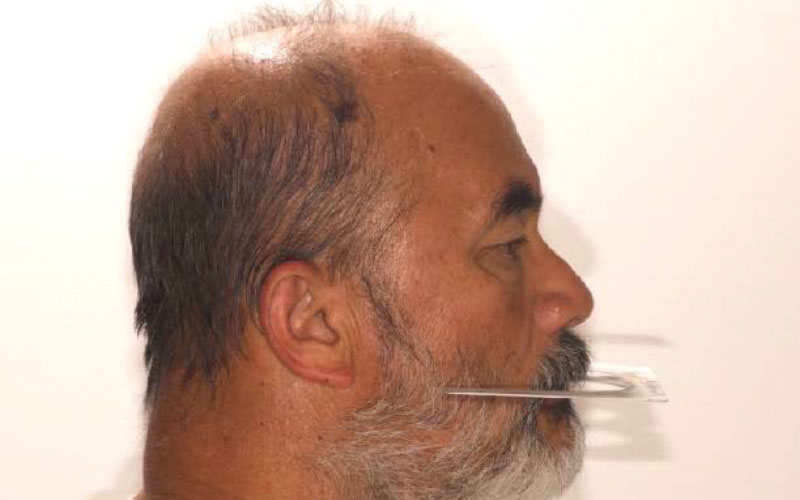
the Fox plane held with a resin seal at place in the patient's mouth can be photographed in both the anterior and lateral positions. This allows the technician to get a sense of the horizontal plane comparing the Fox plane to the pupils of the patient. The lateral shock can give a sense of the anterior posterior plane that would be represented by the connection of a line parallel to Camper's plane, which goes between the ala of the nose and the tragus of the ear. These photographs can be used by the technician to modify the occlusal point if necessary, or at least confirm the plane as it is currently set.

2nd Appointment

The occlusion can be checked, evaluated, and modified on the monolithic denture. Any changes made here will be duplicated in the final prosthesis.

2nd Appointment

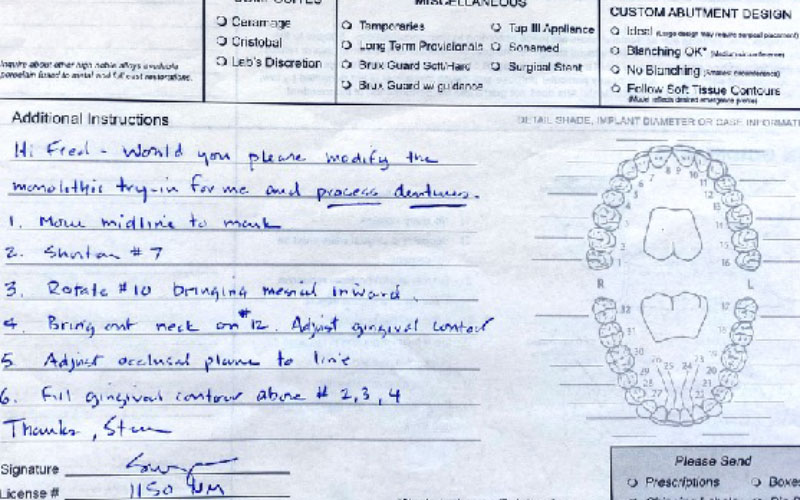
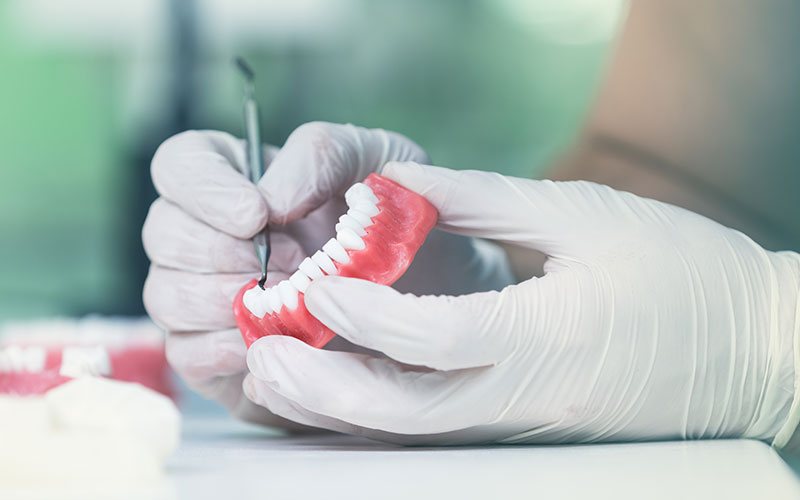
Notes are taken on the prescription form and they typically reference the photos and photos of the monolithic denture as they will be marked using a Sharpie pen.

2nd Appointment

 One of the disadvantages of the monolithic dentures, the inability to move teeth and wax. This can be a reason not to use a monolithic denture in certain circumstances. Specifically when the patient is very aware of the aesthetics and the prosthesis is very demanding and would best be served by seeing a trial denture that has both independent teeth and gingival colored wax.

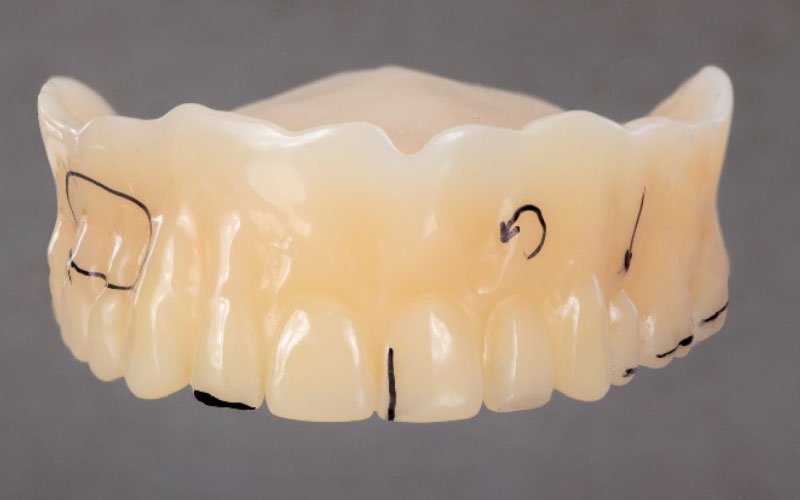
The best way to communicate with the trial denture to the technician is to, one, re scan the denture, following any modifications made to the occlusion or to the tissue surface itself, or by using photographs taking of the monolithic denture marked with a Sharpie. And this illustration, we could see that it was suggested that the midline be moved to the left, tooth number two rotated, tooth number 13 possibly have the buccal portion of the tooth placed buccally. Over teeth number three, it was suggested that more wax contour be positioned there.

2nd Appointment

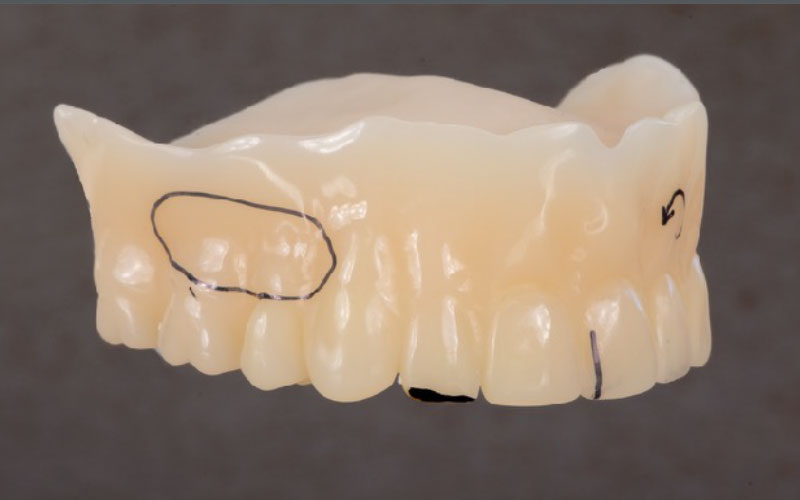
the circle over teeth numbers three and four indicate the need for a filling of the contour in that area.

2nd Appointment

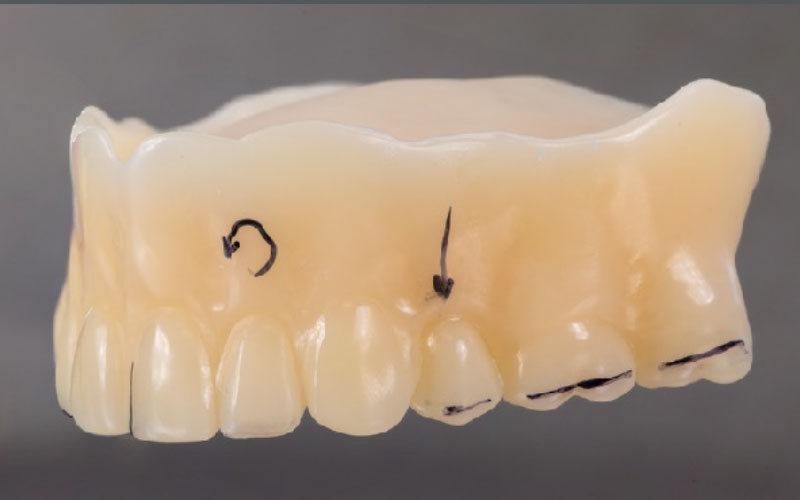
The Sharpie indicates the change of the anterior, posterior plane of occlusion, the need to reposition tooth number 12 and the request to rotate tooth number 10.

2nd Appointment

One of the important advantages of a monolithic try-on is the ability for the patient to wear the prosthesis home short term and evaluate the fit, aesthetics, and function of the prosthesis prior to constructing the final prosthesis, to be delivered at appointment three.

In this illustration, the technician has added gingiva-colored resin to the prosthesis, creating a better sense of the final prosthesis as the patient work over several weeks. In some cases, this may not be a good idea.

It's been said that there have been patients that have decided that this prosthesis was good enough for them, and they didn't return for the final prosthesis. This is unfortunate for several reasons. The material is not designed for long-term use, and you can have significant wear of the occlusion over months.

2nd Appointment

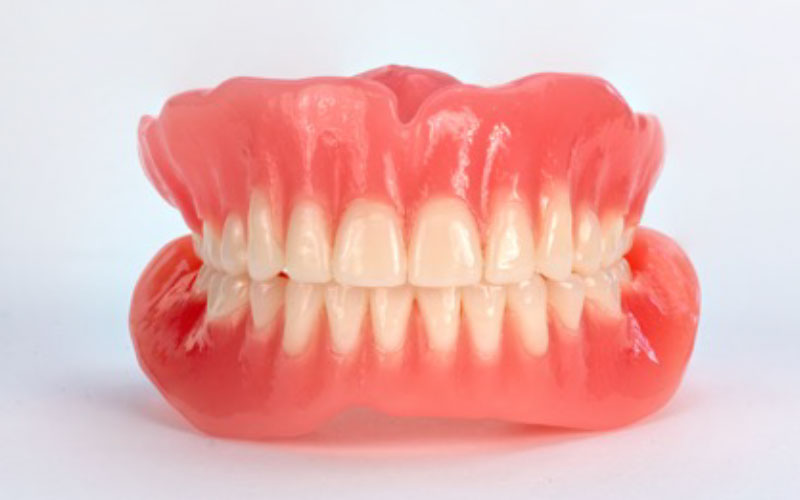
This is an example of a trial denture that was worn by the patient for several weeks. He returned to the office with a comment that he liked the aesthetics of the prosthesis, he felt that the maxilla prosthesis was very retentive and he was pleased, but he did feel that the mandibular denture was not as retentive as possible. At this point, a new final impression was made using Aquasil Ultra + LV and that was in turn, judged by the patient to be more retentive.

2nd Appointment

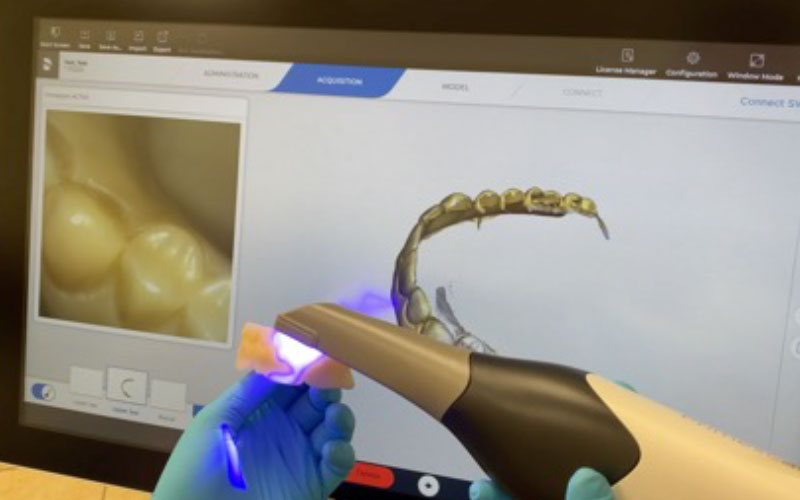
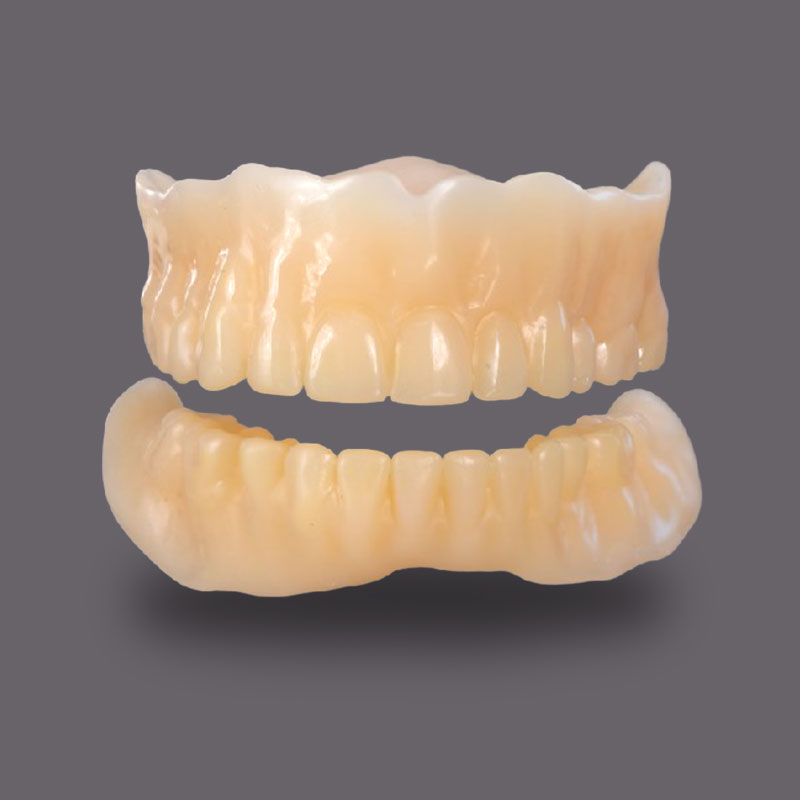
Following the approval by the patient and the approval by the clinician, the monolithic dentures are then scanned using an intraoral scanner. All surfaces are scanned; the intaglio surface, the cameo surface, and the occlusal surface of each. The interocclusal record is made using a buccal bite intraorally and that data is then sent to the laboratory. If the prosthesis were satisfactory and no adjustments were needed, the secondary scan is not necessary; rather, it is reported to the technician to base the final prosthesis on the existing model of the denture and the final denture is then constructed.

2nd Appointment

The dental technician then modifies the prothesis based on the data collected appointment two.

3rd Appointment
Reference Denture
3rd Appointment

The final prosthesis is constructed using either milling or printing techniques. This should be an exact replica of the model of the dentures, and the changes made to that denture appointment two.

3rd Appointment

The great advantage of modifying the monolithic denture appointment two is that the final prosthesis rarely needs to be touched. Occlusion might need to be finessed, but the prosthesis itself should fit just like the final prosthesis, as the monolithic prosthesis. This is a great advantage of the digital workflow.

chevron-up-circle linkedin facebook pinterest youtube rss twitter instagram facebook-blank rss-blank linkedin-blank pinterest youtube twitter instagram